
Use an IDE, dbx and Databricks Repos to develop a Kedro project
This guide demonstrates a workflow for developing Kedro projects on Databricks using your local environment for development, then using dbx and Databricks Repos to sync code for testing on Databricks.
By working in your local environment, you can take advantage of features within an IDE that are not available on Databricks notebooks:
Auto-completion and suggestions for code, improving your development speed and accuracy.
Linters like Ruff can be integrated to catch potential issues in your code.
Static type checkers like Mypy can check types in your code, helping to identify potential type-related issues early in the development process.
To set up these features, look for instructions specific to your IDE (for instance, VS Code).
If you prefer to develop a projects in notebooks rather than an in an IDE, you should follow our guide on how to develop a Kedro project within a Databricks workspace instead.
Note
Databricks now recommends that you use now use Databricks asset bundles instead of dbx. This Kedro deployment documentation has not yet been updated but you may wish to consult What are Databricks Asset Bundles? and Migrate from dbx to bundles for further information.
What this page covers
The main steps in this tutorial are as follows:
Prerequisites
An active Databricks deployment.
A Databricks cluster configured with a recent version (>= 11.3 is recommended) of the Databricks runtime.
Conda installed on your local machine in order to create a virtual environment with a specific version of Python (>= 3.8 is required). If you have Python >= 3.8 installed, you can use other software to create a virtual environment.
Set up your project
Note your Databricks username and host
Note your Databricks username and host as you will need it for the remainder of this guide.
Find your Databricks username in the top right of the workspace UI and the host in the browser’s URL bar, up to the first slash (e.g., https://adb-123456789123456.1.azuredatabricks.net/):

Note
Your databricks host must include the protocol (https://).
Install Kedro and dbx in a new virtual environment
In your local development environment, create a virtual environment for this tutorial using Conda:
conda create --name iris-databricks python=3.10
Once it is created, activate it:
conda activate iris-databricks
With your Conda environment activated, install Kedro and dbx:
pip install kedro dbx --upgrade
Authenticate the Databricks CLI
Now, you must authenticate the Databricks CLI with your Databricks instance.
Refer to the Databricks documentation for a complete guide on how to authenticate your CLI. The key steps are:
Create a personal access token for your user on your Databricks instance.
Run
databricks configure --token.Enter your token and Databricks host when prompted.
Run
databricks fs ls dbfs:/at the command line to verify your authentication.
Note
dbx is an extension of the Databricks CLI, a command-line program for interacting with Databricks without using its UI. You will use dbx to sync your project’s code with Databricks. While Git can sync code to Databricks Repos, dbx is preferred for development as it avoids creating new commits for every change, even if those changes do not work.
Create a new Kedro project
Create a Kedro project with the databricks-iris starter using the following command in your local environment:
kedro new --starter=databricks-iris
Name your new project iris-databricks for consistency with the rest of this guide. This command creates a new Kedro project using the databricks-iris starter template.
Note
If you are not using the databricks-iris starter to create a Kedro project, and you are working with a version of Kedro earlier than 0.19.0, then you should disable file-based logging to prevent Kedro from attempting to write to the read-only file system.
Create a Repo on Databricks
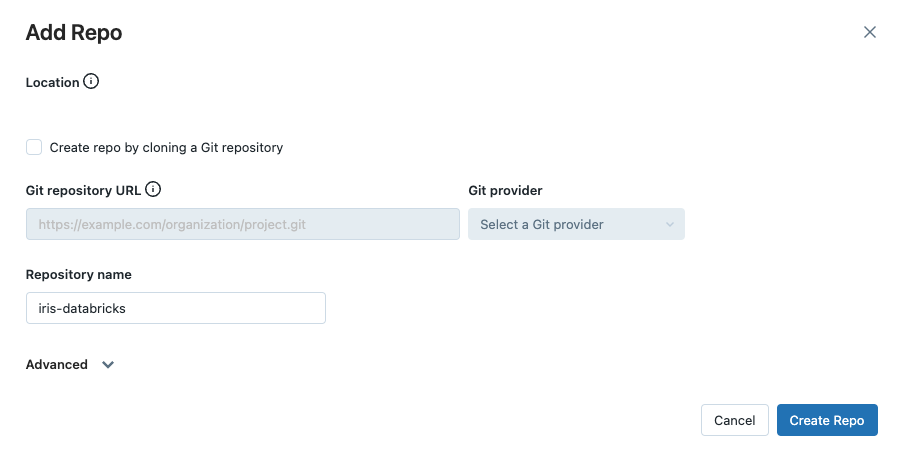
Create a new Repo on Databricks by navigating to New tab in the Databricks workspace UI side bar and clicking Repo in the drop-down menu that appears.
In this guide, you will not sync your project with a remote Git provider, so uncheck Create repo by cloning a Git repository and enter iris-databricks as the name of your new repository:
Sync code with your Databricks Repo using dbx
The next step is to use dbx to sync your project to your Repo.
Open a new terminal instance, activate your conda environment, and navigate to your project directory and start dbx sync:
conda activate iris-databricks
cd <project_root>
dbx sync repo --dest-repo iris-databricks --source .
This command will sync your local directory (--source .) with your Repo (--dest-repo iris-databricks) on Databricks. When started for the first time, dbx sync will write output similar to the following to your terminal:
...
[dbx][2023-04-13 21:59:48.148] Putting /Repos/<databricks_username>/iris-databricks/src/tests/__init__.py
[dbx][2023-04-13 21:59:48.168] Putting /Repos/<databricks_username>/iris-databricks/src/tests/test_pipeline.py
[dbx][2023-04-13 21:59:48.189] Putting /Repos/<databricks_username>/iris-databricks/src/tests/test_run.py
[dbx][2023-04-13 21:59:48.928] Done. Watching for changes...
Keep the second terminal (running dbx sync) alive during development; closing it stops syncing new changes.
dbx sync will automatically sync any further changes made in your local project directory with your Databricks Repo while it runs.
Note
Syncing with dbx is one-way only, meaning changes you make using the Databricks Repos code editor will not be reflected in your local environment. Only make changes to your project in your local environment while syncing, not in the editor that Databricks Repos provides.
Create a conf/local directory in your Databricks Repo
Kedro requires your project to have a conf/local directory to exist to successfully run, even if it is empty. dbx sync does not copy the contents of your local conf/local directory to your Databricks Repo, so you must create it manually.
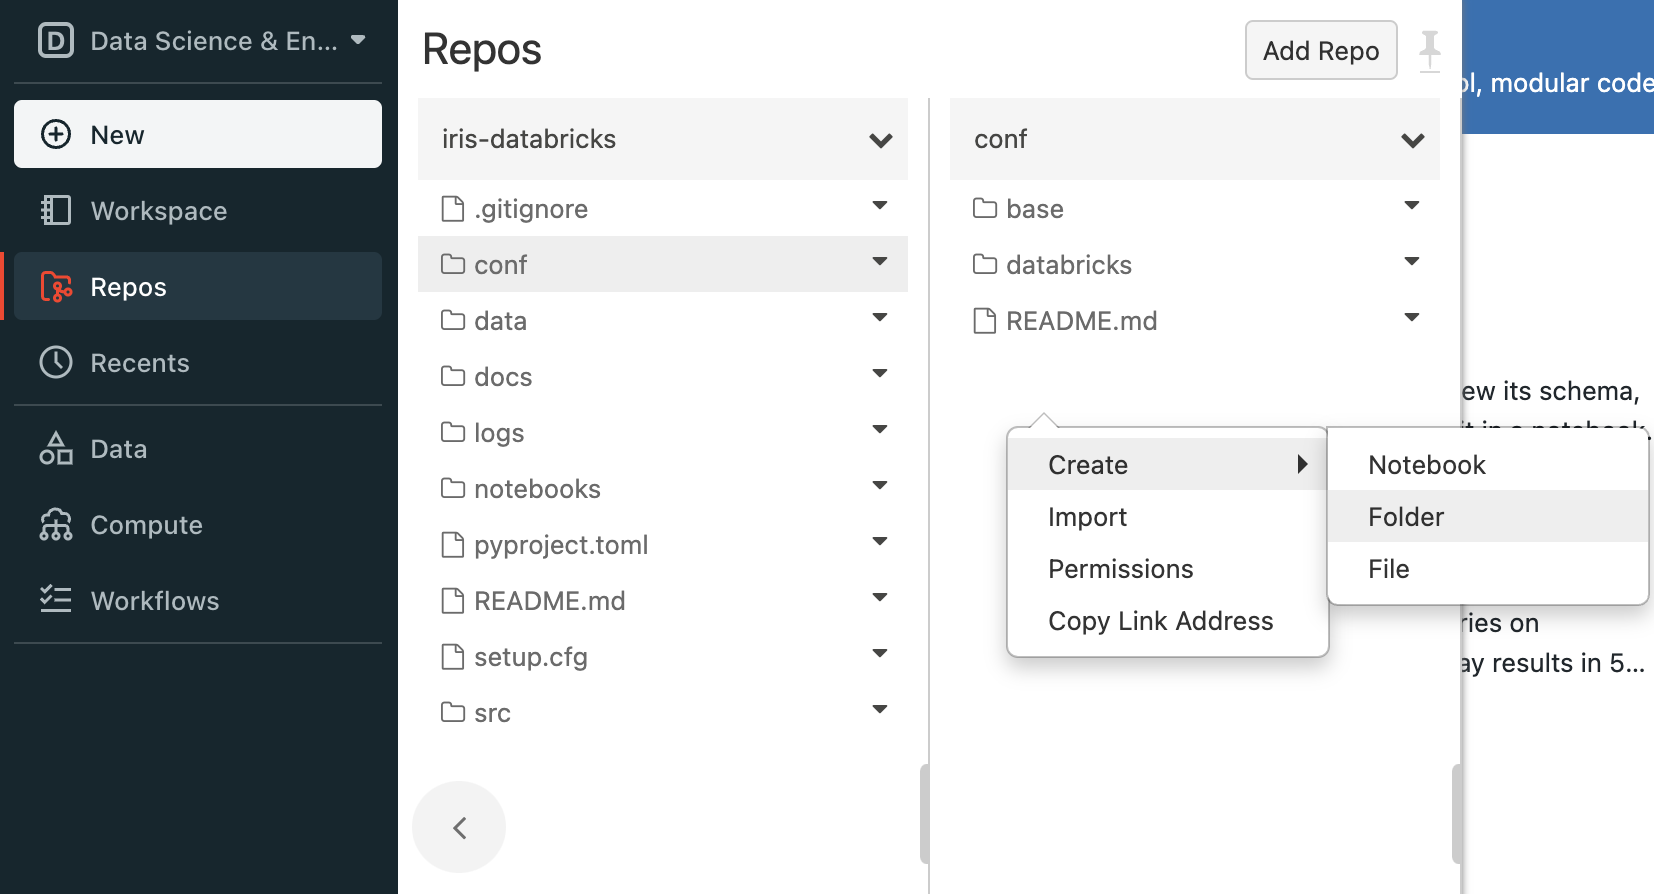
Open the Databricks workspace UI and using the panel on the left, navigate to Repos -> <databricks_username> -> iris-databricks -> conf, right click and select Create -> Folder as in the image below:
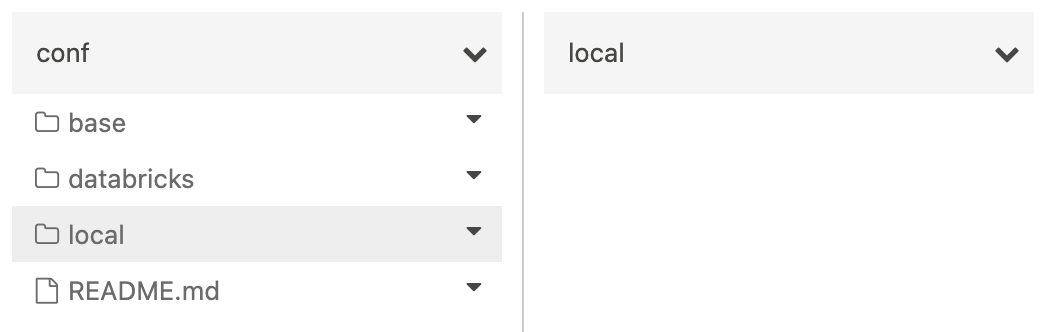
Name the new folder local. In this guide, we have no local credentials to store and so we will leave the newly created folder empty. Your conf/local and local directories should now look like the following:
Upload project data to DBFS
When run on Databricks, Kedro cannot access data stored in your project’s directory. Therefore, you will need to upload your project’s data to an accessible location. In this guide, we will store the data on the Databricks File System (DBFS).
The databricks-iris starter contains a catalog that is set up to access data stored in DBFS (<project_root>/conf/). You will point your project to use configuration stored on DBFS using the --conf-source option when you create your job on Databricks.
There are several ways to upload data to DBFS. In this guide, it is recommended to use Databricks CLI because of the convenience it offers. At the command line in your local environment, use the following Databricks CLI command to upload your locally stored data to DBFS:
databricks fs cp --recursive <project_root>/data/ dbfs:/FileStore/iris-databricks/data
The --recursive flag ensures that the entire folder and its contents are uploaded. You can list the contents of the destination folder in DBFS using the following command:
databricks fs ls dbfs:/FileStore/iris-databricks/data
You should see the contents of the project’s data/ directory printed to your terminal:
01_raw
02_intermediate
03_primary
04_feature
05_model_input
06_models
07_model_output
08_reporting
Create a new Databricks notebook
Now that your project is available on Databricks, you can run it on a cluster using a notebook.
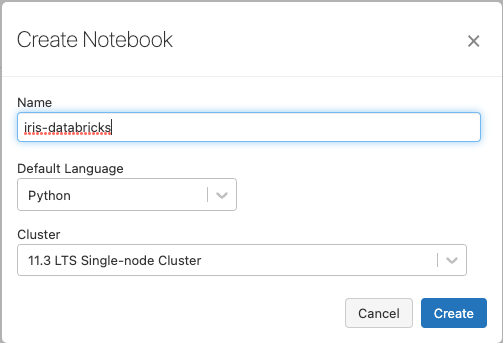
To run the Python code from your Databricks Repo, create a new Python notebook in your workspace. Name it iris-databricks for traceability and attach it to your cluster:
Run your project
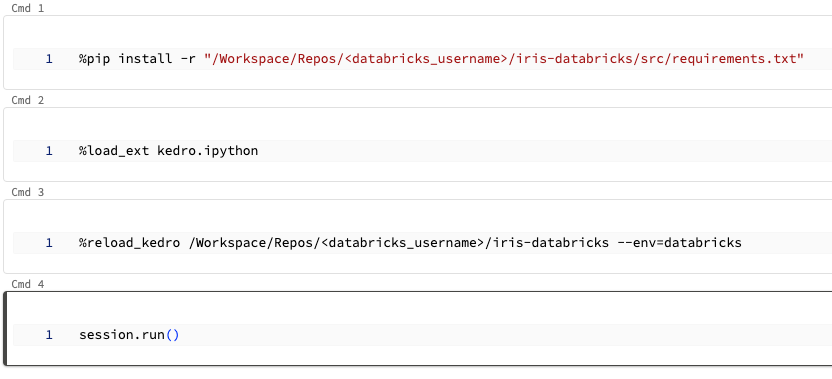
Open your newly-created notebook and create four new cells inside it. You will fill these cells with code that runs your project. When copying the following code snippets, remember to replace <databricks_username> with your username on Databricks such that project_root correctly points to your project’s location.
Before you import and run your Python code, you’ll need to install your project’s dependencies on the cluster attached to your notebook. Your project has a
requirements.txtfile for this purpose. Add the following code to the first new cell to install the dependencies:
%pip install -r "/Workspace/Repos/<databricks_username>/iris-databricks/requirements.txt"
To run your project in your notebook, you must load the Kedro IPython extension. Add the following code to the second new cell to load the IPython extension:
%load_ext kedro.ipython
Loading the extension allows you to use the
%reload_kedroline magic to load your Kedro project. Add the following code to the third new cell to load your Kedro project:
%reload_kedro /Workspace/Repos/<databricks_username>/iris-databricks
Loading your Kedro project with the
%reload_kedroline magic will define four global variables in your notebook:context,session,catalogandpipelines. You will use thesessionvariable to run your project. Add the following code to the fourth new cell to run your Kedro project:
session.run()
After completing these steps, your notebook should match the following image:
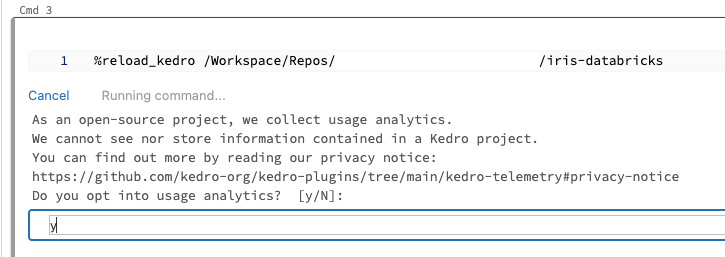
Run the completed notebook using the Run All bottom in the top right of the UI:

On your first run, you will be prompted to consent to analytics, type y or N in the field that appears and press Enter:
You should see logging output while the cell is running. After execution finishes, you should see output similar to the following:
...
2023-06-06 17:21:53,221 - iris_databricks.nodes - INFO - Model has an accuracy of 0.960 on test data.
2023-06-06 17:21:53,222 - kedro.runner.sequential_runner - INFO - Completed 3 out of 3 tasks
2023-06-06 17:21:53,224 - kedro.runner.sequential_runner - INFO - Pipeline execution completed successfully.
Modify your project and test the changes
Now that your project has run successfully once, you can make changes using the convenience and power of your local development environment. In this section, you will modify the project to use a different ratio of training data to test data and check the effect of this change on Databricks.
Modify the training / test split ratio
The databricks-iris starter uses a default 80-20 ratio of training data to test data when training the classifier. In this section, you will change this ratio to 70-30 by editing your project in your local environment, then sync it with the Databricks Repo using dbx, and then run the modified project on Databricks to observe the different result.
Open the file <project_root>/conf/base/parameters.yml in your local environment. Edit the line train_fraction: 0.8 to train_fraction: 0.7 and save your changes. Look in the terminal where dbx sync is running, you should see it automatically sync your changes with your Databricks Repo:
...
[dbx][2023-04-14 18:29:39.235] Putting /Repos/<databricks_username>/iris-databricks/conf/base/parameters.yml
[dbx][2023-04-14 18:29:40.820] Done
Re-run your project
Return to your Databricks notebook. Re-run the third and fourth cells in your notebook (containing the code %reload_kedro ... and session.run()). The project will now run again, producing output similar to the following:
...
2023-06-06 17:23:19,561 - iris_databricks.nodes - INFO - Model has an accuracy of 0.972 on test data.
2023-06-06 17:23:19,562 - kedro.runner.sequential_runner - INFO - Completed 3 out of 3 tasks
2023-06-06 17:23:19,564 - kedro.runner.sequential_runner - INFO - Pipeline execution completed successfully.
You can see that your model’s accuracy has changed now that you are using a different classifier to produce the result.
Note
If your cluster terminates, you must re-run your entire notebook, as libraries installed using %pip install ... are ephemeral. If not, repeating this step is only necessary if your project’s requirements change.
Summary
This guide demonstrated a development workflow on Databricks, using your local development environment, dbx, and Databricks Repos to sync code. This approach improves development efficiency and provides access to powerful development features, such as auto-completion, linting, and static type checking, that are not available when working exclusively with Databricks notebooks.